Your computer’s storage can fill-up quickly if you use it for a long time. As you copy or transfer files from other devices, it tends to fill up your storage very quickly. It’s possible to expand your computer’s storage by purchasing an external hard disk that comes into different storage capacities up to 12 TB. Or maybe you can upload your files on the cloud (Internet) to free-up some storage locally. These are great options, nevertheless, but they have their own limitations in terms of storage capacities and price. At some point of time, you may run out of storage and you’re forced to either delete some existing files or pay more for additional storage. There’s a better way — Search for duplicate documents in Windows 11 and make room for new files. Read on to know how.
What are Duplicate Files?
Duplicate files are productivity killers. They are the identical versions of the same files that may be scattered across different folders, drives or sometimes, different devices.
Too many versions of the same document can cause a lot of chaos and confusion. With a disorganized file library, you’ll find working on the same document again, or unable to search for the right document when you need it urgently. You may not need most duplicates unless you’re preserving them for specific purposes such as backup copies for your original files. You can delete unwanted duplicates and regain your lost storage.
Method 1: Manually Sort & Identify Duplicates Files Using File Explorer
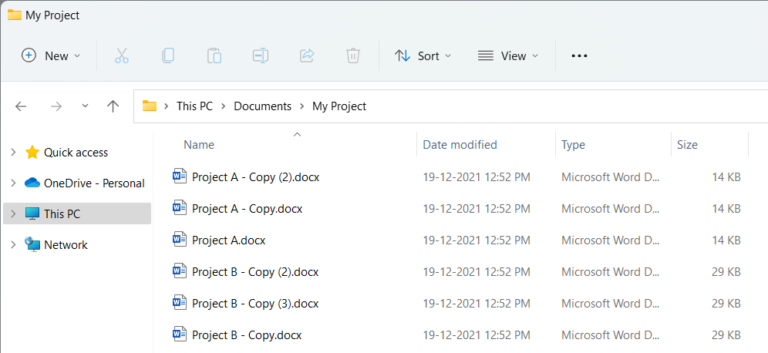
We all use File Explorer to browse through drives, folders and access our files. One of the less known things about File Explorer is its ability to manage and organize our files. For example, File Explorer can help you sort your files alphabetically by their names. You can identify the duplicate copies which may have suffixes at the end of the file name — for example — Copy (2), Copy (3), etc. These suffixes can indicate your file could be a clone copy of the original file. If you’re using OneDrive application to store your documents, you can also scan OneDrive folder for duplicates in the similar manner.
Steps:
1. Click on the File Explorer icon on your Taskbar.
2. Go to the folder that contains a lot of your duplicate files.
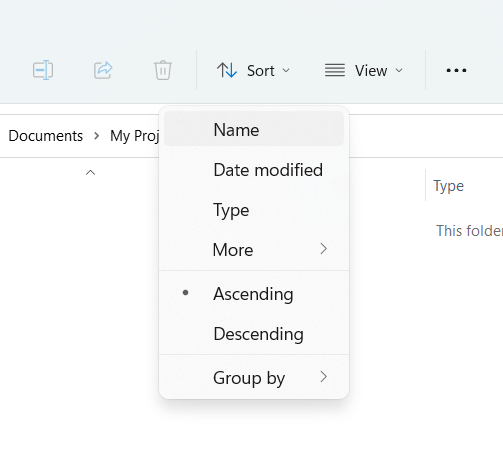
3. Click on the Sort by icon > Name.

4. File Explorer will sort your files in ascending order.
5. Look for files with – Copy (2), – Copy (3) and various other prefixes to identify duplicates.
Benefits:
- It’s free-of-cost
- There’s no need to download a special software
Limitations:
- Finding duplicate files using File Explorer requires a lot of time and effort. Your duplicate files may not exist in a single folder. They may be scattered across multiple folders and drives, which can further complicate the procedure.
- Manually finding duplicates involves the risk of accidental deletion. You may accidentally delete original files thinking they are duplicate versions.
- A lot of duplicate files can have completely different file naming structure than the original files. Solely relying on the file name criteria may not help you free up significant storage.
Method 2: Manually Search for Duplicate Documents Using the Windows Search
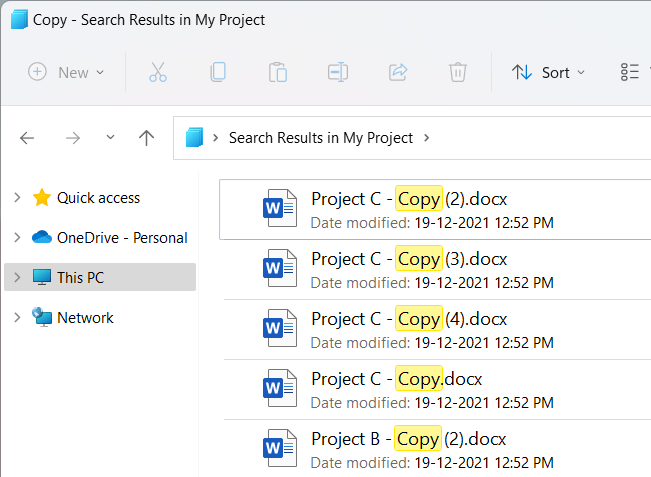
Another way to find duplicates is to use file name suffixes into the Windows Search. Here’s how:
Steps:
- Click on the File Explorer icon on the Taskbar.
- Go to a drive that contains your files.
- In the Search Box on the top right corner, type one of these suffixes: Copy, – Copy (2), – Copy (3)

Limitations:
Much like the Method # 2 above, the benefits and limitations are almost the same.
Method 3: Finding Duplicates Automatically (Fast & Easy)
The easier, faster and secure way to identify and fix duplicate files is to use an algorithm-based software DupInOut Duplicate Finder.
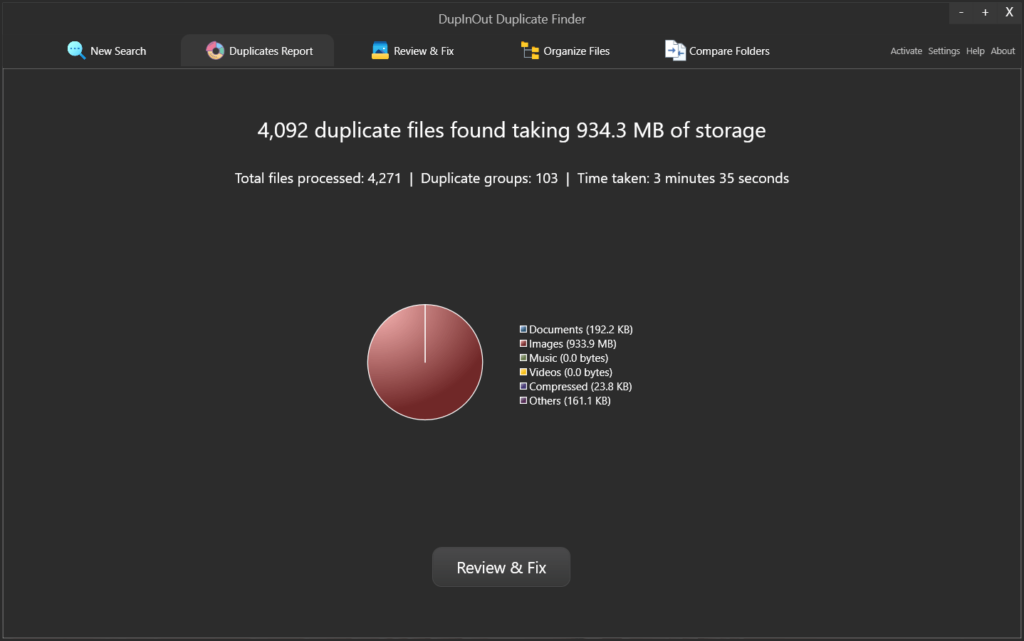
DupInOut Duplicate Finder hashes the contents of your files to identify duplicate files. It uses the industry-standard file hashing algorithms such as SHA-256, MD5, to provide highly accurate results. Once the duplicate scan is finished, it’ll display a comprehensive report with a pie-chart.

Steps:
Step 1: Download and install DupInOut Duplicate Finder.
Step 2: Click on the New Search tab.
Step 3: Drag and drop the folders you want to scan for duplicate files into the “Drop folders here to search”.
Step 4: Click on Start Search.
Step 5: Once the duplicate search is completed, you’ll see the scan report. Click on Review & Fix.
Step 6: Click on Mark Duplicates and choose one of the file marking criteria. When you mark the files, you’re choosing those files to fix.
Step 7: Keep in mind, you can also choose one of the custom file marking patterns to mark or unmark files from a specific folder or drive. You can also mark/ unmark files by their names, sizes, creation/ modification date. Just click on the Custom Mark button and choose a pattern of your choice.
Step 8: Finally, click on Select Action, and choose one of the following options:
- Delete permanently: Use this option to permanently delete all the marked duplicate files.
- Rename files: Use this option to add a prefix or suffix to your marked duplicate copies. This way, you can differentiate the duplicates from the original files.
- Move to Folder: Use this option to separate the duplicates to another folder, so that you can choose which files to keep and which ones to delete.
- Move to Recycle Bin: Use this option to move all the marked files to the Recycle Bin, a temporary place from where you can restore files again, if required.
- Replace with shortcut: Use this option to replace the duplicate files that you’ve marked with Shortcut files (.lnk). Upon double-clicking these shortcuts, Windows will open the original file.
This way you can search for duplicate documents in Windows 11 and dedupe your PC.