Microsoft OneDrive app comes pre-installed on all computers that are shipped with Windows 11 and Windows 10. This small yet powerful app serves as a secure and reliable online storage for your documents & pictures. You can access your files from any device and save gigabytes of local storage. If your PC breaks down, you can still access your important documents using another Internet-connected device.
While OneDrive has its own advantages, it may still malfunction. If you regularly face Internet connectivity issues, you may experience one or more of the following problems:
- Syncing your documents will take longer than usual
- OneDrive file syncing may stuck for apparently no reason
- Your synced files may not show up at all
- OneDrive app may freeze and not respond
- OneDrive app may display errors or crash unexpectedly
Are you facing any of these issues? If so, look no further and keep reading this workaround.
Close & Re-open OneDrive
A temporary glitch with OneDrive app can cause file syncing issues, errors and other issues. Exit the OneDrive app through its system tray icon, and then re-open it again.
- Click on the OneDrive’s system tray icon.
- Click on the Settings icon, and select the Quit OneDrive option.
- In the confirmation prompt, click on Close OneDrive.
Sign-Out & Sign-In Again
Sign-out of your OneDrive account sign-in again. It can resolve file syncing and account authentication issues.

- Click on the OneDrive icon in your system tray.
- Click on the Settings icon.
- In the new dialog, click on the Account tab.
- Click on Unlink this PC.
- In the confirmation prompt, click on the Unlink account button.
- Wait for a while.
- Click on the OneDrive icon and sign-in to your account again.
Clean Up Temporary Files
OneDrive requires sufficient free storage space in order to function correctly. If you don’t have enough storage, you may experience file syncing issues, OneDrive lags, and other similar issues.

Windows is equipped with a powerful tool to analyze and delete various types of temporary files. Here’s how to use it:
- Click on Start > Settings.
- Click on the System tab.
- Click on Storage.
- Click on Temporary Files.
- Windows will analyze your temporary storage and display various kinds of temporary files. (For example: Downloads, Previous Windows installations, Delivery Optimization Files, etc.)
- Choose the temporary files you want to delete, and then click on Remove Files.
Reset OneDrive App Settings
There is a way to reset the OneDrive app and set default configurations. Resetting can fix most app problems.
- Exit OneDrive completely.
- Click on the Search Box on your Taskbar.
- Type CMD
- Right-click on the Command Prompt and select Run as Administrator.
- Type the following command and press Enter: %localappdata%\Microsoft\OneDrive\onedrive.exe /reset
Uninstall and Reinstall OneDrive
If the resetting didn’t help, you might want to uninstall OneDrive and reinstall it again. If there are problems with OneDrive program files and components, they will be fixed.

- Exit OneDrive completely.
- Click on the Start button.
- Click on the Settings icon.
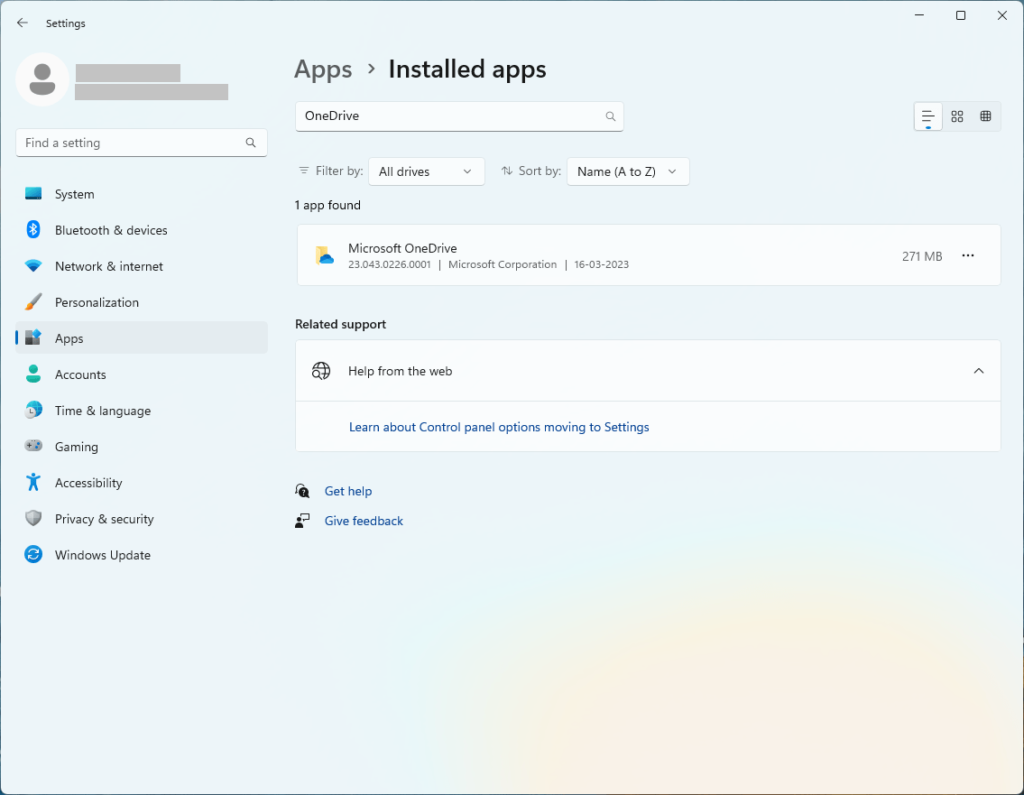
- Click on Apps > Apps & Features.
- In the Search box, type OneDrive.
- Once the OneDrive app is displayed in the search results, click on the Uninstall button.
- In the confirmation prompt, click on the Uninstall button, and follow the on-screen instructions.
- Restart your computer.
- Download Microsoft OneDrive from its official website.
Remove Duplicate Files
According to a knowledgebase published on Dell, OneDrive sync issues may also occur if there are multiple files with duplicate file names. Scan your OneDrive folder and remove any duplicates found using the OneDrive Duplicate Finder tool and see if that helps.